Wednesday, August 10, 2011

My Chicago Scrapbook

I just finished up a mini book on a recent trip our family made to Chicago, and today I wanted to share it with you. I love it for many reasons...but the top two are...1)I bought it as a kit from our local Archiver's, and 2), I finished the bulk of it before the trip, journaled while on the trip, and then added the photos when I got home.
You may recognize the kit using Pink Paislee's Daily Junque. I didn't make my book according to the directions (I'm not one to follow along those lines--call me a rebel that way.) BTW, if you're interested, they're still available online here. You will also notice that I added a few of my own elements and leftovers here and there. The plastic #5 is an example of a found item put to good use there...
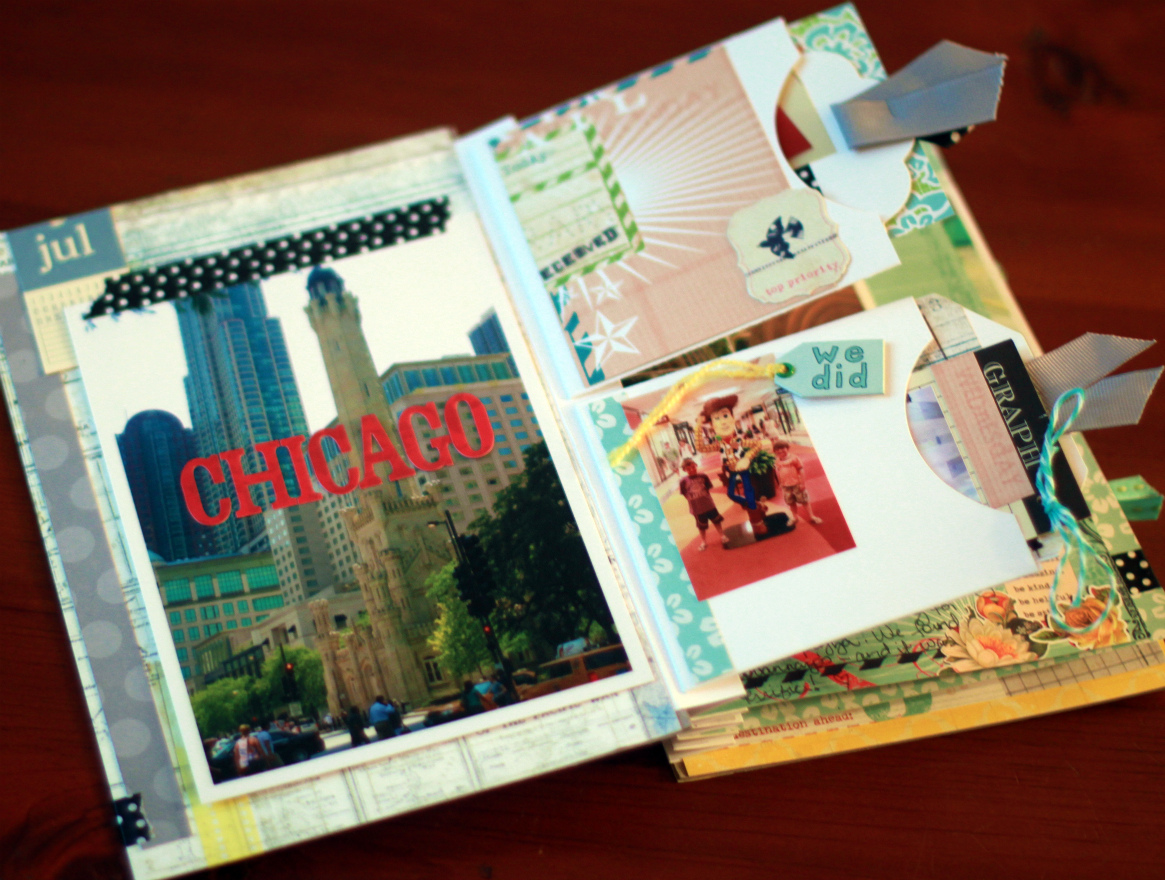
The way they had the book designed, it was interactive with the pockets and tags already. So I just added a little more (because I'm always looking for a unique way to add more photos to my mini books...)
In the above page, I used Smash masking tape as a hinge to showcase 2 more 5x7 photos. On the right, I added 2-3 tags with mini photos into each of the library pockets.

I love how they used glycine bags in this kit. I added another two of my own!
They're cool because you can see a lot through them, and it encourages the reader to peek.
I also added a few iPhone pics in the mini.
The last page stored our receipts to Shedd Aquarium, our fortunes from fortune cookies when we ate Chinese, and a few leftover pictures that didn't quite make it into the mini.
And this photo showcases the binding and the back.

Thanks for letting me share with you today!

Tuesday, August 9, 2011

scrapbook on the road


{warning: photo heavy post}
This past spring I participated in the class Ali Edward's offered online called Scrapbook on the Road.  It is a smallish album that is put together before a vacation. It allows for documentation and journaling to take place on the road. Even though her class provides a fairly straight forward approach, it can be adapted to one's personal taste and needs, giving the freedom to journal and take notes while the experience of the trip is happening.

I have a few scrapbook on the road albums to put together this year. The first one stayed fairly close to Ali's example and followed her prompts fairly close. It was a great weekend project, and creatively inspiring.

Here and here is a look at my take on the book before journaling and photos were placed in side.

And today I will share what the completed project looks like::


each day is separated by a transparency and quote
with tags already in place, it's easy to add epherema while on the road
envelopes throughout the book housed other finds
postcards added to the book while on the road were also used for journaling
this is the back of the before mentioned postcard
photos were added once i was home that supported that days journaling
again with the postcard. sometimes they can capture a place better than ones camera
There are more days and photos and journaling...but I think you get the idea.
I took with me a mini kit of a glue stick, hole punch, mini attacher, scissors, needles and thread plus pen
. These items and I sat down every evening and journal-ed the days events. It was a bit of an act of discipline to do this part, but when I was home and the memories were past, I was so glad for those quiet moments in the evening to remember what was important.


wip siggy

Monday, August 8, 2011

Birthday Balloon Wreath

When I saw this balloon wreath on Pinterest, I knew I had to recreate it...
It took less than hour to create, and it cost under $10!! Gotta love that!
You can check out the tutorial on how to make one here. I did the same thing, except my wreath form was Styrofoam, and found at the dollar store (along with all the balloons!).
The other difference is that I decided to add colored pipe cleaners in my version. I cut them in half, and spiraled them around a pencil to form a "spring" look. They stuck right into the foam! The perfect way to greet guests as they arrive for a birthday party, don't ya think?

Enjoy your day!

Friday, August 5, 2011

This & That School Tray

This awesome tray is cuter than you can even imagine. My friend Jen made it, and I squealed when I saw it! She and her handy dandy Silhouette created this beautiful work of art. You too can get all the details right here. Kerri Bradford, we love you!! :)

One more thing--check out this awesome deal on canvas wraps--too good to pass this one up!

Enjoy your day!

Thursday, August 4, 2011

Fresh Eyes

I want to share a little tip I just recently figured out (yeah, I'm a little slow). I used to photograph my layouts as soon as I was finished with them, but I recently realized that waiting until the next day allows me to see my page through "fresh eyes," and I almost always add something to it that makes it feel more "complete."

Let me show you what I mean. On this page...


...what I added the next day were the gold dots to my letters and around the circles and that wave punched border and the little word sticker with the brads. How boring my page would have been without these details!

And on this page...

...I know it's a pretty simple, plain page, and I wanted it to have a clean, open look. My mom is very patriotic, and I'm going to have her journal on the back her thoughts about her love for America. Anyway, what I wound up adding the next day were the rhinestones near the stars and the rinestone on the asterisk by the title.


I'm so glad I finally figured out this little trick. So many times, I've looked back at my pages on my blog or in the 2Peas Gallery and thought, Oh, I wish I had added such and such. If you haven't tried this "fresh eyes" approach, give it a whirl and let me know what you think!


Tuesday, August 2, 2011

Photo Tutorial: Cookie Cutter Tool

Happy August everyone! Can you believe summer is nearly over? Let alone school will be starting in three weeks for some of us. I'm not looking forward to summer coming to an end. This month, I created scrapbook layouts displaying lots of summer time photos.

Here is a simple & easy technique to creating photo raindrops using any Photoshop Elements (9) program. Click on images for larger view.


First select the "Cookie Cutter Tool" to the left on the screen.


There at tons of images to chose from. For this project, select the "Raindrop" image.


Use your mouse to click within the image & drag over the area you want to show through the raindrop shape.


Once you've determined the size of the shape, click the green check mark to complete selection.


"Flatten" the image.


Crop & resize photo as desired & print.


Hand-cut raindrop images & embellish on a scrapbook page. This really gives a new twist to creating & a nice change from using the standard 4x6 or other square type of photos.

Cheers & happy creating!

Monday, August 1, 2011

Baby Shower Centerpieces

Recently, I helped out with a friend's baby shower. Today, I wanted to show you an example of the cute and affordable centerpieces that I created for the event...

Here is a photo of the supplies I used. Not pictured: scrap paper to cover the cans. I also used a few doilies, newspaper, and scraps of lace and ribbon.Here is a photo of one of the finished cans...
And another...
And here is a close-up of some of the pennants. As you can see, I simply attached the pre-made Girls Paperie embellishments to the front of a Martha Stewart die cut with foam tape. I inserted a wooden skewer (found at your local grocier) and added ribbon. If you look closely at the bottom right one, you'll see I wrapped the wooden skewer with pink masking tape. Yet another use!


No two were alike! I ended up making 10 of these for about $18 (because I used paper and ribbon I already had.) Not bad, eh? I hope you're so inspired to go out and create something fun today as well...

Special thanks to Jamie Pate, who used those veggie cans and inspired me to want to hoard them. :)

Enjoy your day!