Friday, May 11, 2012

Pool Noodle--Double Duty

If you're anything like me, we have a bunch of these pool noodles laying around in our garage.  Check this out--you'll be floored with what they did with Pool Noodles!!

Adorable shower decor, right?  Yep--you guessed it!  Cut up pool noodles!
What about the next time you need a wreath form?  Simply attach with duct tape, and you're good to go!
Enjoy your day!!

Wednesday, May 9, 2012

Graduation Decor

At the beginning of the school year, I shared this idea of using foam core board as the basis for extra large letters that were altered. Well, this project is the same concept, only I'm using it as decor for an upcoming graduation...
Our family will be hosting a graduation party for our niece in about a month.  I got a jump start on decorations by creating this giant "M" for her.  (The initial represents her high school--this monogram was copied directly from the school website and used.  Feel free to use your school's monogram by searching the school's website or by using the initials alone...)

I started out by buying a sheet of solid black foam core (32x40).  Using a pencil and a yardstick, I mapped out the varsity letter.  Next, I cut the letter carefully (be careful to not bend--it will crack and break).  I used a carpenter's knife, but a good sharp exacto would work perfectly.  You may need to go through several passes to cut through clearly.  I sanded the edges carefully so the edges weren't so jagged and rough.  It took all of about 30 minutes.
Taylor's school colors are blue and white.  So I took the liberty of tinting all of her senior pictures blue, and printed them out.  This project took about 35 photos (but M is a larger letter.  An "I" would take much less, for example.)  When I printed them, I elected a black edge and matte finish (I use Costco.  LOVE.)  Normally, I'd never recommend using a wet glue on photos.  But for this project, I highly recommend it because I have no intention of reusing the pictures, so insuring the archival quality of them isn't important.
The banner was created using posterboard.  I free-handed it, and outlined the edges with a black sharpie.  I was torn about what to write on the banner, and have elected to make a pennant banner to hang above this (look for another blog post on this one), which will state the word "Congratulations!" I did use the Cricut to cut out the letters.  I need to find a way to work in the "Class of 2012" as well.  Still a work in progress...

For more information on how to create the letters, check the original blog post on them here.

Now, for those of you who have a limited imagination, I want to offer a few suggestions.  Short on photos?  Try using their own pictures that have been posted on their social media (Facebook or Instagram are perfect for this project!)  Simply right click on the photo and save it to your computer!  Why not use "2012" instead of the school's monogram?  I love the project because it makes a big impact for a little cash.  Total cost of the project was about $15. 

Feel free to post any questions--I'll be sure to answer! 

Enjoy your day!

Tuesday, May 8, 2012

Fundraiser Update & Teacher Appreciation

Last month, I sold discounted Clearance WIP Kits to raise funds for the local elementary school. I deemed it the "Face lift Fund" because my intent is to perk up the building and INSPIRE the students and staff who live a lot of their days there.  A HUGE THANK YOU to everyone who participated!!  Here is what I did with the money...

Acrylic Name Plates for Teachers
One of the projects I've taken on is photographing each of the staff members, and creating a name plate for them that is hung by their classroom door.  This was to serve two purposes:  1) to identify teachers to students, parents and visitors, and 2) to update the outdated name plates.  Each photo was printed out in 5x7, and matted using a sheet of scrapbook paper--use your stash!-- (cut 10x10) and framed in an 8x10 acrylic box frame (found at any craft store, Walmart or Target.) The paper wraps around the sides of the frame, and I enjoy how it looks.   I did take the liberty to add the name of each teacher to the photo before printing, but you could easily add it with stickers as well.  So far, I've only completed about 25% of the staff.  I should be finished by the end of this month.  Cost:  $5 per project.

Cricut Die Cut Machine and Cartridges for the School Staff.
I purchased and donated a Cricut and cartridges for the staff.  The school  librarian will be in charge of the unit, and staff can "sign out" the device, as well as cartridges, just like a book in the library system.  This way, nothing gets lost or misplaced.  LOVE.

School Posters and Artwork, Using Images of the School

I purchased and donated 10 poster frames (24x36) for the hallways.  I took photos of the school itself, added text (favorite quotes about learning and teaching) and enlarged them.  They were printed at Costco, and I framed each one myself using acrylic poster frames, and hung them in the hallways.  I wanted the students to recognize the images when they saw them, and to realize and appreciate what we have there, and that this art applied to them.  I've been really happy with how they've worked, and I plan to add a few more.  I also plan to add two memorial frames to the hall, in honor of two students who have passed away.  Their spirit is part of that place.

All this, because you guys helped me.  I'm not finished.  The school needs a lot of work, and I plan to continue on with this work.  Stay tuned for more updates!!  Again--thank you SO MUCH for your support!!  It means more than I can ever express.
Enjoy your day!!

Monday, May 7, 2012

My Travel Mini

Hello Monday!! Today, I'm sharing my version of the May Project Kit. Warning: this is a picture heavy post, people.
The inside cover and first page.  First page is made up of a homemade file folder made from a 12x12 sheet of kraft cardstock.  It opens up (see below)...
I created a pocket out of the left side.  Two tags hold journaling and one more small photo, documenting a trip to the Farmer's Market while on vacation...
Back of the file folder.  I used Instagram and Frametastic for iPhone, and printed these bad boys out in 4x4.  Left side is a 4x6 page I created using a sheet of patterned paper from the kit.
Smaller instagram photos, and handwritten journaling are found throughout the mini.  It went together pretty quickly...
I enjoyed editing pictures on my iPhone, and using collages available before uploading them for printing.  SO easy and FUN!!
I LOVE, LOVE, LOVE the Heidi Swapp file folders.  I created this insert by opening the file folder, laying it on its side, and folding it long-ways.  I reinforced the "pockets" by sewing them up on the folds. 
The backs of the file folders were adorned, too...
No two pages were alike in this book.  Lots of different sized photos (8x10, 8x8, 6x6, 5x7 and 4x6) in this mini made it fun to play...

This is a 5x7 pocket page, made from a scrap piece of packaging from something that was on my table randomly...
I LOVED using the Martha Stewart divided page protectors.  The wallet photos fit in the slots perfectly!!


The Martha Stewart full page protector housed a tide schedule for the beach, two menus from the week, and a map to the plantation we visited.  A home for everything!!


The back of the page protector:
I made a bunch of collages and printed them out on one 8x8.  I cut the collage in half, and glued the backs together to create a 4x8 photo.  I loved it!
I housed a ton of vertical 4x6 photos in my own make-shift flip up, using Washi tape and chipboard.  I got 10 photos on this section of the book!
And last but not least, the back cover houses the Heidi Swapp photo flip up (premade from Heidi Swapp).  I LOVE how the pages got larger as they went along.  Such a fun concept!!

Thanks so much for letting me share today!!  Enjoy your day!!

Saturday, May 5, 2012

10 Snap[shots you should keep on your phone.


I saw this over on Pinterest and thought it was pretty informational!  What did we do before these phones?
Enjoy your weekend!!

Friday, May 4, 2012

Summer Decor (New Mantlescape Part 2)

Wanted to share a few more beachy decor details today (a continuation from yesterday's blog post.)

In the center of our coffee table, I set up a divided wooden container inside an XL woven basket. In each of the sections, I tried to group shells, sea glass, and beachy items I've collected from our travels to display in our home. I found the wooden "Beach" sign at Home Goods, and leaned it on the side.

In our morning room, I did a mini vignette of favorite things (which also included beachy items.)


I included a few paper goods, along with our beach findings from this year's vacation in that star shaped bowl.  It's official--we're ready for SUMMER!!

Enjoy your day!!

Thursday, May 3, 2012

New Mantlescape (Part 1)

I know it is Spring. But face it--my mind is slowly drifting to summer. Only 5 weeks before school is out around here!! So this past week, I did a little mantlescape that should last me well into the Summer...

I started out with two empty frames that I had on hand, purchased at garage sales.  For the larger frame, I hung thin wire as a "clothesline" for my pennants.  I used the papers from the May Project Kit, and went to town.

I altered a few of the pennants, using black and white photos from our recent vacay to the beach.  I hung them with plain mini clothes pins.  It took less than an hour.  I didn't over-analyze it, and just played...

The smaller white frame was perfect for framing a torn and wrinkled map my son had in his closet.  I used foam core to back it so it wasn't flimsy.  Next, I found an unused part of a transparency, and simply placed it along side the map.  Easy peasy!

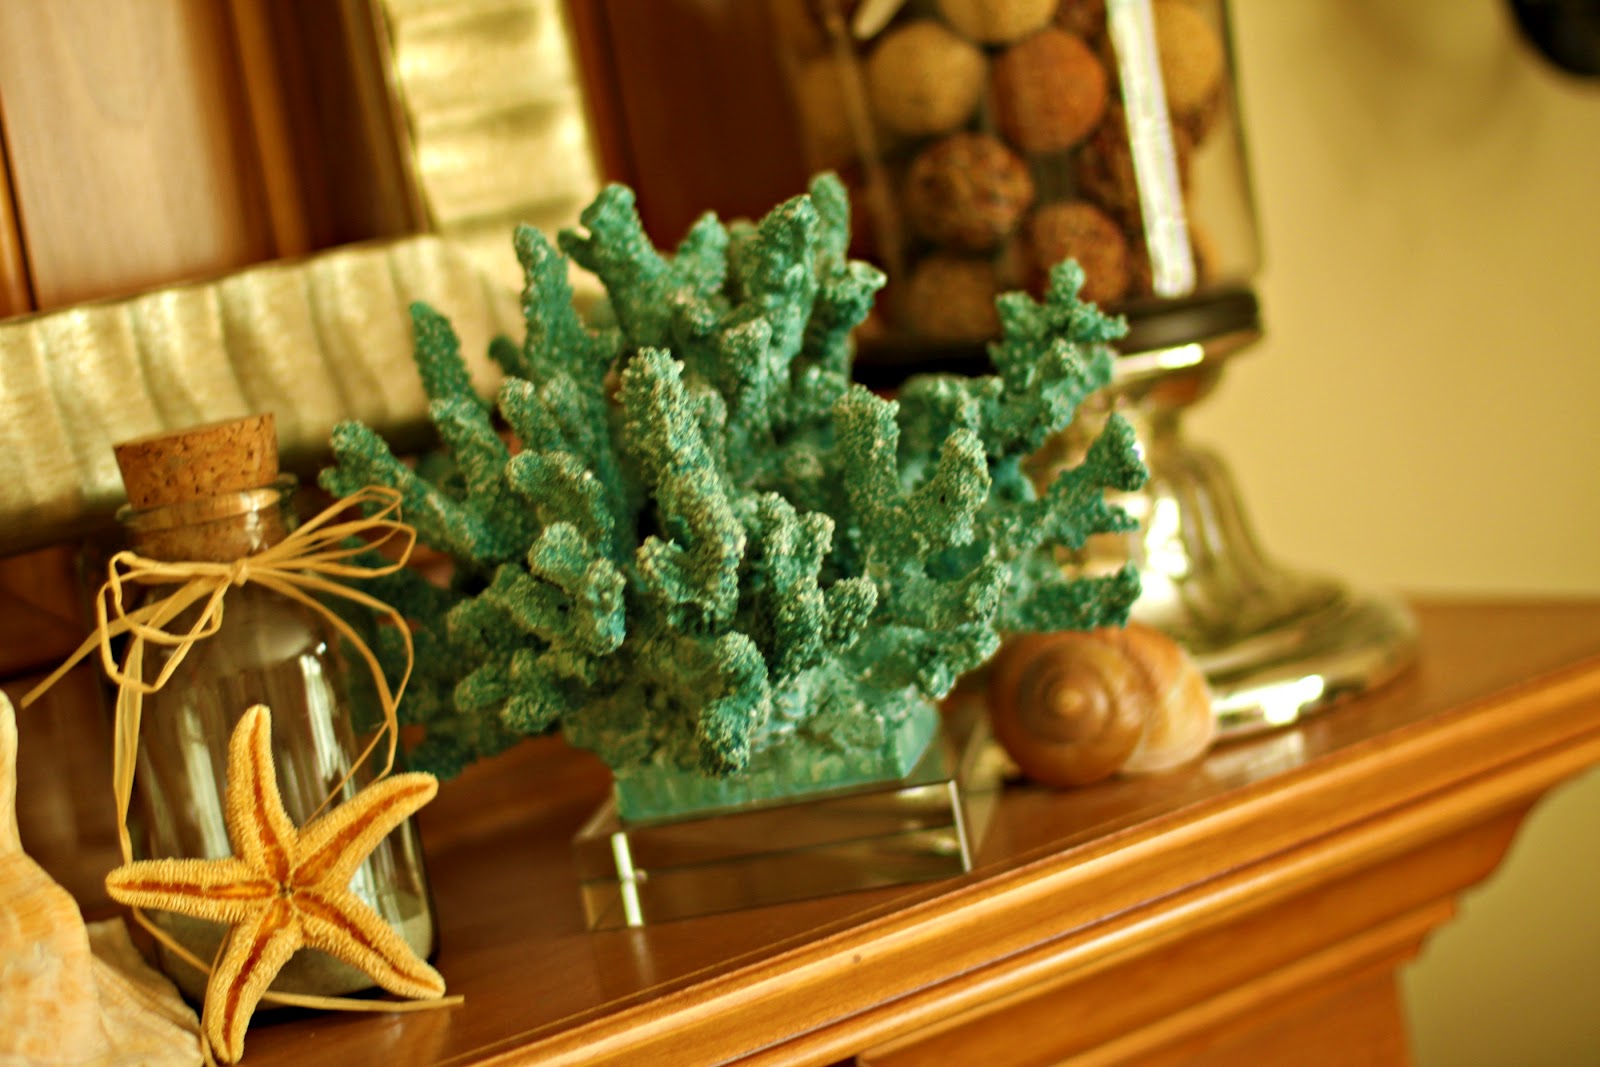
Next, I added a few more beachy items.  I found the blue coral at Home Goods.  Some of the shells were purchased at the Dollar Store.  Others we got while on vacation.  A lovely mix of all things beachy...

And to add more of a statement to the focal point in our room, I continued the theme on the hearth of the fireplace.  In the evenings, flameless candles will flicker and provide the ambiance we want without heat.
Enjoy your day!!

Tuesday, May 1, 2012

Cooler Corn

Had to share this awesome idea...
(copied directly from Pinterest, with no direct link to a blog or site--sorry!)
SO Cool!! Am I the only person who hasn't heard of "cooler corn"? As an obsessive food nerd, you'd expect that I would have at least heard of it, but over the weekend I was blind-sided by the simple genius of this method for cooking loads of corn on the cob perfectly. I was hepped to it while visiting my family in Maine . Short story: We like corn on the cob. And with eight adults at the table, that means a couple of dozen ears. We would have used the lobster pot to cook them all, but the lobster pot was busy steaming lobster. Then my sister, a capable Maine cook with years of camping experience, says "let's do cooler corn!" Before I can ask "what the hell is cooler corn?" a Coleman cooler appears from the garage, is wiped clean, then filled with the shucked ears. Next, two kettles-full of boiling water are poured over the corn and the top closed. Then nothing. When we sat down to dinner 30 minutes later and opened it, the corn was perfectly cooked. My mind was blown. And I'm told that the corn will remain at the perfect level of doneness for a couple of hours. Turns out, Cooler Corn is pretty well known among the outdoorsy set but for those of us who avoid tents as much as possible, it's perfect for large barbecues and way less of mess than grilling. In fact, I may even buy another cooler just so I'm ready for next summer. Now that I'm in the know.       

Wow.  I'm SO doing this!!

Enjoy your day!