Sunday, January 31, 2010

Sharing a few layouts...

...from the V-Day WIP Kit...

These pics aren't the best (sorry about that!). I have a new favorite paper. Can you guess which one? I've used it on like 909 layouts this month. (okay, slight exaggeration.)

And can I say a big "THANK YOU!" to Miss Emily Spahn for posting that layout on handcut titles? She was the inspiration behind the above, thank you very much... :)
This one of our little bugger is simple, but is one of those that turned out better than I had hoped. I love it when that happens. (Kind of a rarity here...lol!)

Kinda felt that way about this one, too...

I've had this picture of my mom on my dashboard for 3 years. She actually doesn't look like this anymore. But it speaks to me for whatever reason. The photo captures her essence, and it is a favorite of mine. I liked it so much, I scanned it and added it to my "She" album about her and journaled this little story. I don't use photos twice usually, but there are exceptions.

That postage stamp paper would be that favorite paper, btw. I've completed 9 layouts and a little treat project with this kit...and there might be time for more!!
Stay tuned for a full DT gallery reveal that will just knock your socks off tomorrow...
Enjoy your Sunday...
Saturday, January 30, 2010

Countdown to V-Day Garland

Last year, the Pottery Barn Advent calendar in their Christmas catalog stuck with me. I finally put their idea into motion this week and made it my own.....

I rounded up 14 red and white boxes in different shapes and sizes. I wanted one for each day in February, as a countdown to Valentine's Day for our children.
I embellished the boxes using Making Memories and Anna Griffin papers and embellies, along with scrap pieces of paper, ribbon and paint...

I strung the garland together (I used eyelets and knots inside the boxes to hold them in place when hung), and I plan on filling the boxes with little sweets and trinkets and love notes...


And this is my finished project (and POTD, too!)

Friday, January 29, 2010

Inspired by...

I originally planned on writing this post about layouts with no photos. Do you have any of those laying around? I had to make a tough decision a couple of weeks ago regarding my job. Should I apply for a new position in a new building? Or should I stay where I am now? I was very stressed out by the whole thing, and I wanted to document it. However, I didn't think a layout with photos of my current school and a sad looking construction site would make for a very good layout! I decided it would be okay to just make a photoless layout!

So that is what this post was going to be about. But then...well then I saw this on Tumblr and knew that I HAD to use it for my layout, and I HAD to share it with you! :)

Hand-cut titles have been a part of scrapbooking for pretty much ever, but lately this look of truly hand-cut letters (like...whip out those child-safe scissors and get to it!) are creeping into peoples work. And I, for one, really like the look of it. :)

So here is my no-photo, hand-cut layout using supplies from the February kit and some of my own stash. It's WAY outside of the box for me...but was also way fun and even a bit therapeutic! :) Thanks for looking!

Thursday, January 28, 2010

Valentine Fortune Cookies

  A few years ago I made these adorable fortune cookie valentines - the are super easy and super cute.

I got the directions from Martha Stewart - of course - click here to see.
All you will need is :
Felt (pink and white)
Pipe cleaners
paper
candy kisses

I think these are cute teacher gifts - put them in a take out box and your set!

*******
And I just for fun I found some images of some more fun fortune cookie items.
Here are some paper ones:


she also has step by step directions here.


         Yummy cupcakes.
How about some soap?

And of course this cute stamp

This necklace is adorable too

These are also felt but oh so cute with their little faces

And a little coin purse


Have a lucky day:)
Michelle

Wednesday, January 27, 2010

New Tools/Products Report

Laina here today!

Ahhh....it's CHA week in Anaheim. It's like the ToySRUs Christmas Toy Catalog for scrapbookers.

Here are some of new tools and innovative products that have caught my eye.
Quickutz released some new fonts, shapes and embossing folders this week. I am already planning on buying the new Garden 4x8 font.


More shapes and fonts will be released soon. This one is adorable:


Tim Holtz has a new machine that looks like a suitcase and cuts and embosses and texturizes. Honestly, I'm pretty confused about it. BUT what I am really excited about are his new tranparent tapes and his embossing folders.
Idea3

I love embossing folders. Obsessed right now is a good word for it. Here is a tutorial on embossing folders I made. Finally some really really really good textures!
Text12
Text78
Text56
Text34

GCD and Melody Ross have a new "texturizing" tool for chipboard. I'm not convinced on this one. I think I'll wait until Archiver's gets it for demo.


I've actually changed my mind on the i-Topper tool. When I saw paper brads being made with it, my reaction was so-so. Now that I have seen fabric brads made - WOW. They are also coming out with backings to make magnets and buttons. Saving an Archiver's 30% off for this one. Imaginisce also has a new rhinestone tool called iRock.


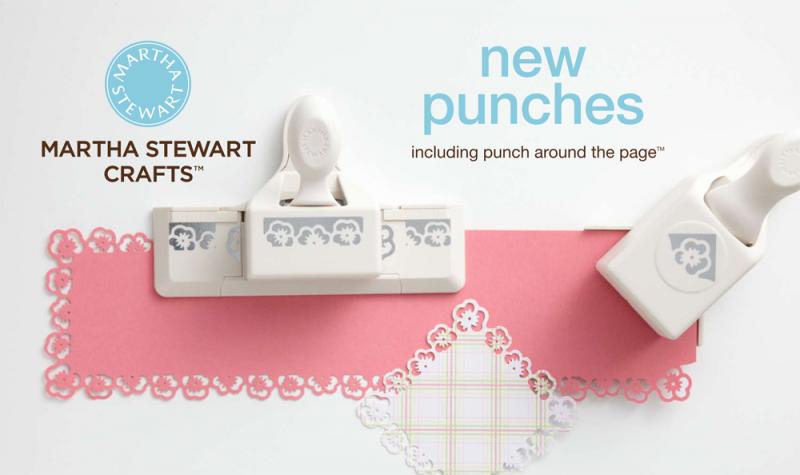
EK Success has 78 new punches coming out plus some of my faves - MARTHA BORDER PUNCHES!


Maya Road has some new "resist" product coming out that can be used with glimmer mists. (By the way - I love a  lot of their new mini chipboards too!)
IMG_5327

Lots of new templates from Crafter's Workshop.
TCW166
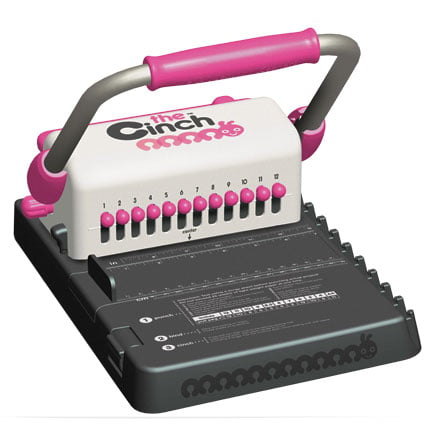
WeRMemoryKeepers has the Cinch. It looks like it will function like a BindItAll.

A new floor model of the Clip it Up from Simply Renee. Yes, you need it! :)
Clip it Up Floor Model
Tattered Angels Glimmer Mist has a bunch of new products.


Creative Imaginations is bringing out a line line called "cuttables". The woodgrain sheet is going to be a must have for me.
CI_Cutables_SneakPeek
CHAW10_SneakPeek_Wood
How will you decide to spend your allowance?

If I have missed any - link em up here!

Tuesday, January 26, 2010

valentine treats


candy coated oreos...


because an oreo needs more chocolate.

supplies::
wilton cookie mold
wilton candy melts
oreos
(wilton supplies also available at michaels)

surprise your loved one for valentines day with chocolate dipped oreos...that is if there are any left.


if playing in candy is not your thing...
then here is a bit of eye candy for you to enjoy too.
valentines day conversation hearts
this one makes me think of trish.
yum
oh my goodness!!!!
o.k...this one just pushed me over the edge...i must stop now.

Monday, January 25, 2010

Valentine Inspiration

I'm not usually a Valentine's Day girl. But I've been finding inspiration everywhere. So many things I want to make and decorate. This year I want to send Valentines. I want to take fun heart photos. I want to decorate with fun lights and albums and cards. I want to crochet hearts. I am feeling the love. Here are a few things I have found inspiring:


Cookies Mantel Here

Sunday, January 24, 2010

My favorite kitchen appliance.

I'm a bit of a freezer fanatic. There. It's out.

I keep a stocked freezer in the kitchen (ready-to-use items) and another full-sized freezer in our garage for food storage. Growing up, my mom always prided herself in having a stocked freezer. I guess I got it from her. When the hubs and I were newlyweds, I recall stating that I wanted to purchase a freezer before a washer and dryer, and he thought I was a loon. I just couldn't imagine not having one. Is it wrong to have a favorite appliance?

Advantages include...buying/storing in bulk...having a wide variety and easy accessibility to food...pre-preparing ingredients for meals...extending the life of leftovers...stocking up and storing meals/desserts when unexpected guests arrive...and my favorite--it's a timesaver.

You get the idea.

Here is a comprehensive food storage guide that I use as a reference. I need to print this out and laminate it and stick it on the side of my freezer. I date items when they're purchased and whenever I have a question, I refer to that list often.

So today I wanted to share a few of my favorite tips...

*Stale uncut bread can be frozen in chunks, removed from the freezer, and turned into bread crumbs. Simply put the frozen cubes into a processor along with Italian seasonings and some Parmesan cheese and you'll have a wonderful breading for chicken.

*Freeze ALL of your cookies after they cool on your cooling racks. Don't ask me why, they just stay fresher and moist when they thaw, and the cookie stays chewy. Yum...

*Keep your freezer full. It will run more efficiently.

*Place a layer of Saran wrap on the top of soups/liquids before placing the lid on a container to prevent ice crystals and freezer burn.

*Frozen corn makes the best ice pack for injured boys. Ask me how I know.

*When I get a new bag of flour from the store, I enclose the flour in an air-tight plastic bag and put it in the freezer for at least 24 hours. When it's removed, leave the tightly closed bag in its place. The cold kills any mites that might have been in the flour, and the plastic protects the flour from getting damp. You'll never have to discard your flour again!

Be sure to check out Love Food, Hate Waste for more info and awesome tips.

Go on...what's your favorite kitchen appliance, and why?

Friday, January 22, 2010

I'm a sucker for V-Day.

This garland is surely on my to-do list...
These pouches are simply lovely...
And I pray I have time for this project too...

Thursday, January 21, 2010

For the love of mini's


This month I am playing with the Valentine kit and having a ball!
I was so inspired by all these papers and knew I wanted to make a mini so I went into my stash and grabbed some coordinating envelopes and using book binding tape put the envelopes/pages together.

I cut the flaps off the envelopes and punched a half circle out for my journaling tag to slide into envelope.

For the cover I used one 6 X 12 sheet up paper I found the center and scored 1/4 inch in each direction from the center. For the ends I scored the extra inch of paper, turned it in and held together with eyelets.
I plan to finish it up in the next couple days!